
These configuration steps are intended for district IT administrators with access to Canvas Admin tools.
Integration Capabilities:
The PLT4M and Canvas integration supports:
- Class Pairing — Connect Canvas courses/classes with PLT4M groups and automatically enroll students in the corresponding PLT4M group.
- Deep Linking — Add links to PLT4M programs and content directly within Canvas courses.
Step 1: Install the PLT4M App in Canvas
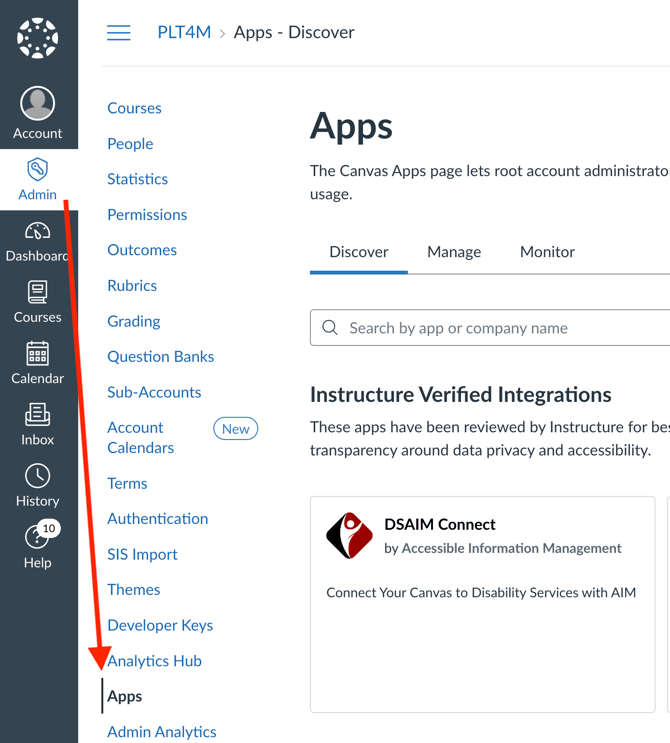
- In Canvas, navigate to the Admin tab and select Apps.
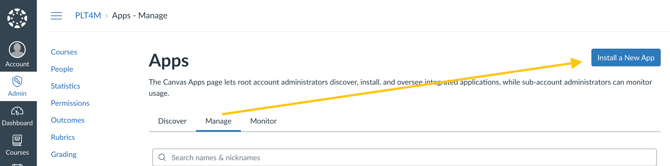
- Select the Manage tab and choose Install New App
- Select LTI version 1.3 and Enter URL as the install method. Copy and paste the following URL:
https://app.plt4m.com/lti/canvas_config
and then choose Next.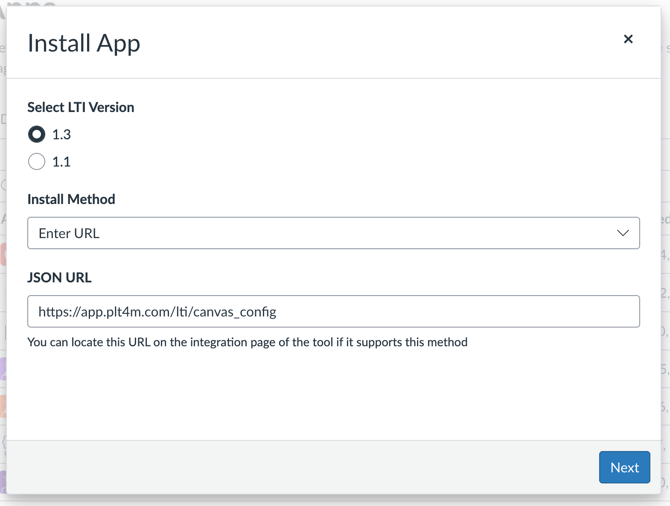
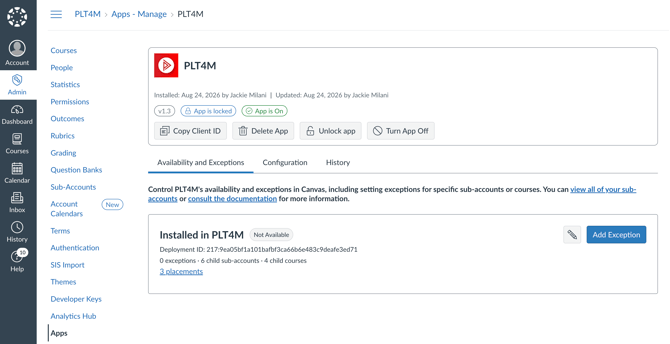
- Configure availability, then click Install App.
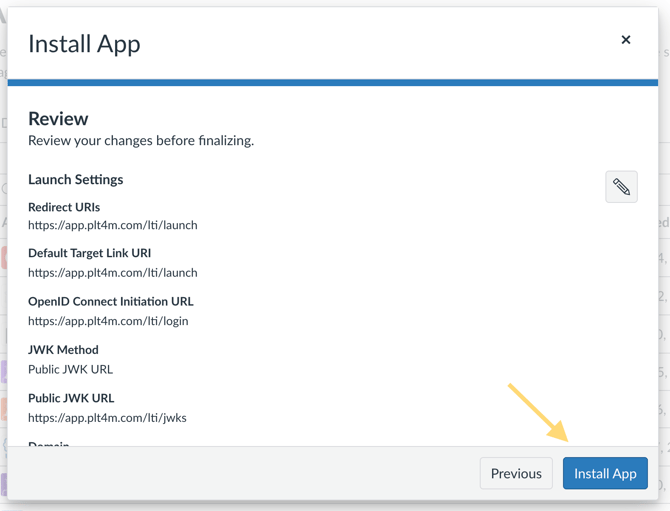
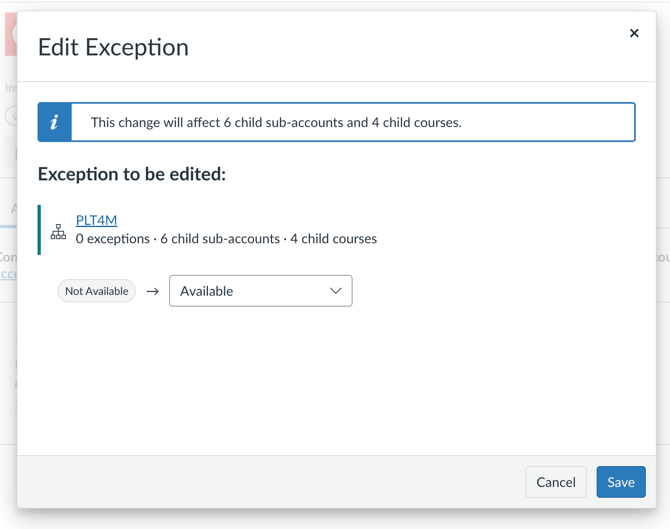
- Modify availability for PLT4M by selecting the edit icon, or Add Exception.
- Select Availability, then Save.
The PLT4M app is now installed.
Step 2: Provide PLT4M with Client ID, Deployment ID, and Provisioning Report
Once the PLT4M app has been installed in Canvas, you'll need to provide PLT4M with your Client ID, Deployment ID and the Provisioning Report with the schools that will use the integration.
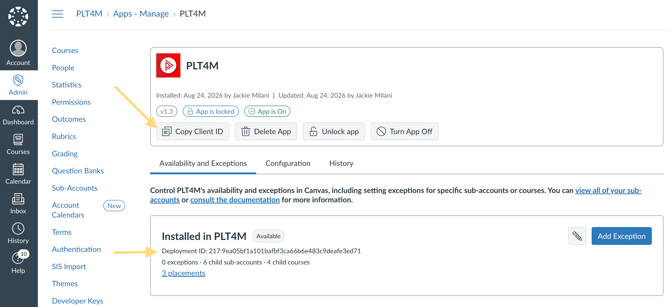
- From the Manage App screen, locate the PLT4M app and select Copy Client ID.
- Locate and copy your Deployment ID.
- Navigate to Admin > Settings > Reports > Provisioning > Configure > Select Accounts CSV.
One root-account install covers every sub-account, so this file is how we tell the schools apart.
Note: Send the above information to your PLT4M representative or support@plt4m.com. PLT4M will use these IDs to complete the integration configuration for your district.
Next Steps
Once you have provided the Client ID, Deployment ID and Provisioning Report, our team will complete the remaining configuration and confirm when the integration is ready to use.
If you have questions or need assistance during the setup process, please contact the PLT4M Support Team.